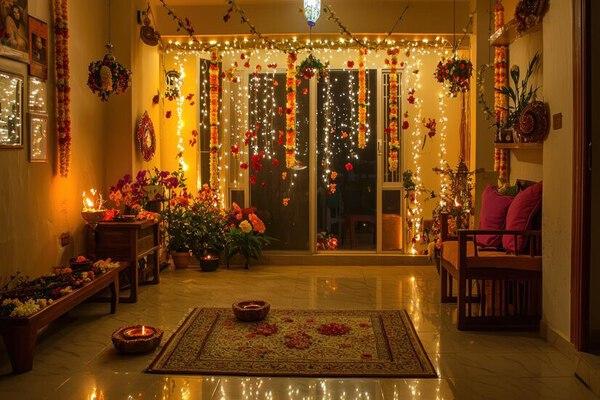
Two years ago I dropped almost two hundred dollars on Diwali decorations from a party store, fancy string lights, plastic rangoli stencils, pre-made paper garlands, and the whole thing still looked kind of flat once it was up. Meanwhile my neighbor decorated her entire porch with marigolds from her garden, mason jars, and some leftover fabric, and it looked like something out of a magazine. It cost her maybe fifteen dollars.
That comparison bothered me enough that I actually asked her how she did it. Turns out she wasn’t doing anything complicated, she was just using what she already had and paying attention to color and light instead of buying “official” decorations. I started applying that same logic the next festival season, and I’ve spent under thirty dollars on decorations for every celebration since, including ones that got compliments from people who assumed I’d hired someone.
This isn’t a list of generic Pinterest ideas you’ve seen a hundred times. It’s what’s actually worked in my own home, what flopped, and the specific mistakes that taught me cheap doesn’t have to mean it looks cheap.
Why Expensive Decorations Often Look Worse, Not Better
This took me a while to figure out. I assumed spending more automatically meant a better result, and that first Diwali taught me otherwise. Mass-produced decorations are designed to look good in a catalog photo, not in your actual living room, and they often clash with everything else around them because they were never designed with your specific space in mind.
What actually makes a space look festive is consistency, repeated colors, layered lighting, and a few focal points, not the price tag on any individual item. Once I understood that, decorating got both cheaper and genuinely better looking.
Step One: Raid Your Own House Before Buying Anything
Before spending a single dollar, I now do a walk-through of my own house looking for anything that could work decoratively. This sounds obvious, but the first few times I skipped this step entirely and went straight to buying things I already technically owned in some form.
Mason jars or any glass jars become candle holders or mini flower vases instantly. Old fabric, scarves, unused tablecloths, even a nice bedsheet, can be draped or used as table runners. String lights from regular holiday decorations work for almost any festival, not just the one they were bought for. And any plants or flowers already growing in your yard, even ordinary ones like marigolds or greenery, add more life to a space than most store-bought arrangements.
Doing this walk-through first usually cuts what I actually need to buy down by half or more.
Step Two: Pick One Color Story and Stick to It
My first attempt at decorating failed mainly because I bought whatever looked pretty individually without thinking about how it would look together. Gold garlands next to blue lights next to red flowers, it was a lot of nice things that didn’t add up to a cohesive look. Now I pick two or three colors max before buying or gathering anything, usually based on whatever I already have the most of. For Diwali, I lean into gold, deep red, and warm white. For a spring festival, I might do soft pink, sage green, and cream. Everything I add after that has to fit within that palette, or it doesn’t go up.
This single change made the biggest visual difference of anything on this list, and it costs nothing, it’s just a decision you make before you start.
Step Three: Layer Your Lighting Instead of Relying on One Source
A single string of lights taped along a wall looks fine but flat. What actually makes a space feel festive is light at different heights and from different sources working together.
I use battery-operated tea lights, the kind you can get in bulk for around ten dollars for thirty of them, placed inside mason jars or small bowls at table height. String lights go higher up, along a window frame or draped from a shelf. And I always keep at least one source of warm, dim light somewhere lower to the ground, even just a single lantern or candle on the floor near an entryway. That combination of heights does more than any single expensive light fixture would.
Real Example: My Niece’s Birthday Festival Setup
My sister wanted to do a festival-themed birthday party for her daughter without spending a fortune, since she’d already booked the venue and was tight on what was left in the budget. Here’s what we actually did together with about twenty-five dollars total.
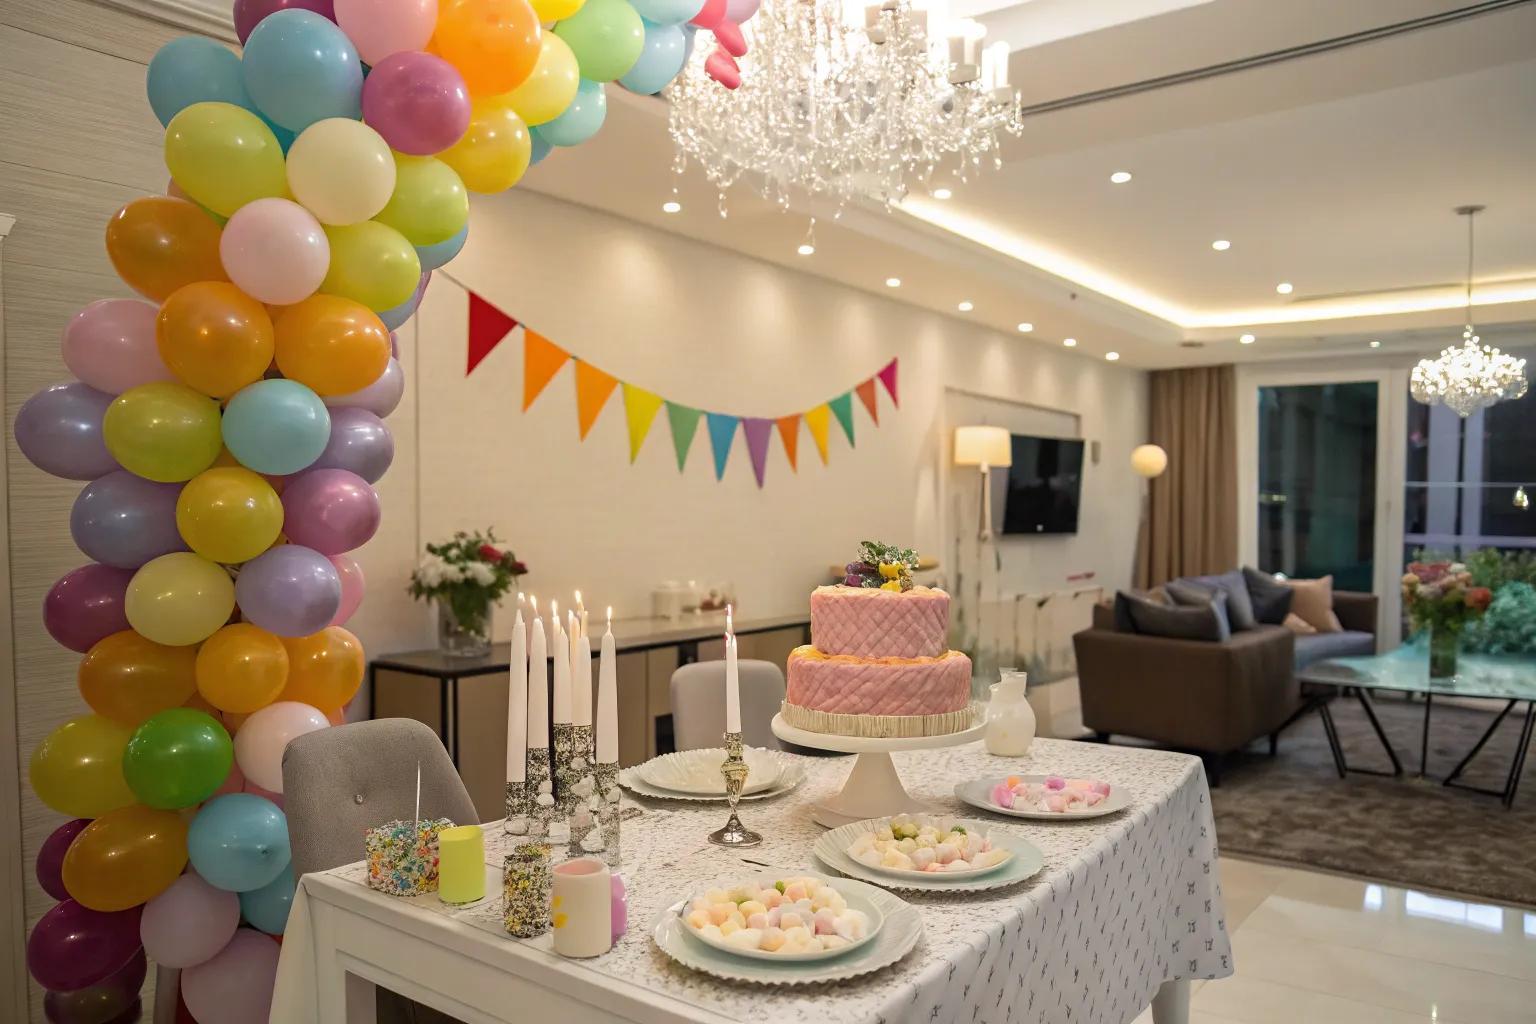
We cut paper streamers from tissue paper she already had in three colors, which took maybe twenty minutes and looked nearly identical to the forty-dollar pre-made garlands she’d been eyeing online. We strung up paper lanterns we’d saved from a previous party instead of buying new ones, nobody could tell they’d been reused. We filled clear balloons, the cheap kind from a dollar store, with a few strands of leftover streamer material inside before blowing them up, which gave them a confetti-filled look without buying actual confetti balloons. And we used cardboard boxes covered in leftover wrapping paper as plant stands to add height variation to the table display instead of buying actual risers.
The party photos genuinely look like a professionally styled event. Almost nothing in them was bought specifically for that day.
Tools and Resources Worth Knowing About
A few things made this process easier once I found them. Canva has a free template section specifically for printable decorations, banners, place cards, even paper decoration cutouts you can print at home on regular paper or cardstock.
Pinterest is genuinely useful here, not for buying anything, but for color palette inspiration before you start gathering materials, searching a festival name plus “color palette” gives a quick visual sense of what combinations work.
A glue gun, if you don’t already own one, is maybe the single best eight-dollar investment for this kind of decorating, it turns leftover materials into actual finished pieces far faster than tape or string.
Common Mistakes to Avoid
Buying decorations the week of the event instead of planning ahead. Last-minute shopping means paying full price and settling for whatever’s left on a picked-over shelf. I now start gathering materials at least two weeks out, even if I don’t put anything up until the day before.
Overcrowding a small space with too many decorative elements. My first attempt had decorations on every single surface, and it ended up looking cluttered instead of festive. Now I pick two or three focal points, an entryway, a table centerpiece, one wall, and leave the rest of the space relatively simple.
Ignoring scale. Tiny decorations get lost in a large room, and oversized ones overwhelm a small one. I learned this after buying decorations sized for a photo of someone’s giant living room that looked awkward and sparse in my much smaller apartment.
Throwing everything away after one use. I used to toss paper decorations and lanterns the day after an event, then buy nearly identical ones the next year. Now I store anything reusable in a labeled box, which has cut my decoration spending by more than half year over year.
A Few More Low-Cost Ideas Worth Trying
Floating flowers or petals in a shallow bowl of water with a single candle in the center makes an instant centerpiece for under five dollars.
Chalk or washable paint markers on glass jars or windows add festive designs that wipe off completely afterward, no permanent mess, no special tools needed.
Fabric scraps tied onto branches collected from outside create a simple, natural-looking decorative tree for almost zero cost, and it works for nearly any festival with a small color adjustment.
What I’d Actually Tell a Friend
If a friend told me they were stressed about decorating for an upcoming festival on a tight budget, I wouldn’t point them toward a store. I’d tell them to walk through their own house first, pick two or three colors and commit to them, and layer their lighting instead of relying on one string of lights to do all the work. That two-hundred-dollar Diwali taught me something I didn’t expect, the look people actually compliment isn’t the most expensive one, it’s the one that feels intentional and put together. You can get that from things you already own just as easily as from a party store, sometimes more easily, since you’re not fighting against decorations that were never designed for your specific space in the first place.
How to Plan a Road Trip That Everyone in the Family Actually Enjoys
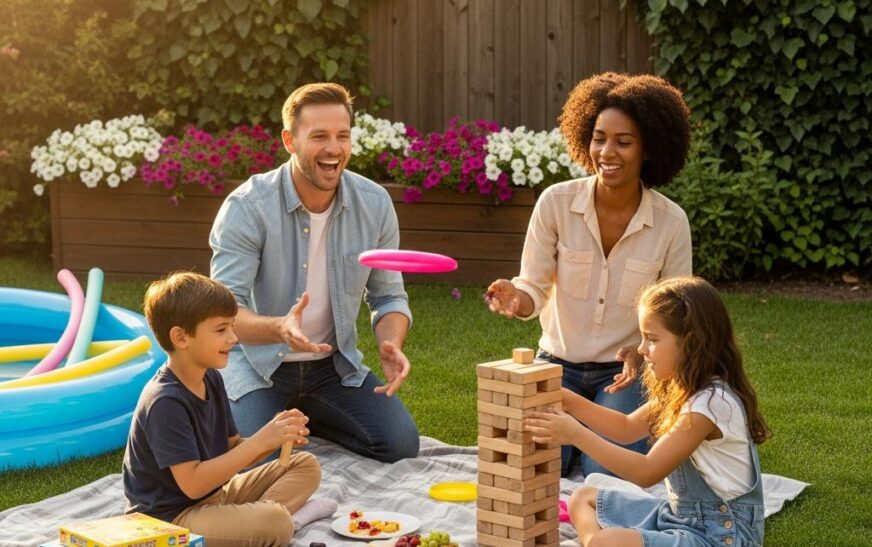
Three hours into our first big family road trip, my husband and I weren’t speaking, my oldest had thrown up from reading in the back seat, and my youngest had asked “are we there yet” so many times I started answering in a flat monotone just to cope. We still had nine hours left to drive. That trip wasn’t a disaster exactly, but nobody enjoyed it, and I remember thinking there had to be a better way to do this.

It turns out there is, and most of it has nothing to do with the destination. The trips that actually went well after that first rough one came down to planning decisions made weeks before we ever got in the car, not luck, not the kids being in a good mood, actual planning. I’ve done probably a dozen road trips with my family since, and I want to walk through exactly what changed.
The Mistake Everyone Makes Planning Their First Road Trip
That first trip, I planned it entirely around the destination and the driving route, gas stops, hotel bookings, the fastest highway. What I completely ignored was the actual experience of being in a moving car for ten hours with kids who have zero interest in efficient travel. The destination matters way less than people think. What actually determines whether a road trip feels good or miserable is how the hours in the car themselves are handled. That’s the part most planning guides skip entirely, and it’s the part that makes or breaks the whole trip.
Step One: Plan Around Attention Spans, Not Mileage
I used to plan road trips by calculating the fastest route and the fewest stops. Now I plan around roughly ninety-minute stretches, since that’s about how long my kids can realistically sit before getting restless, regardless of how interesting the audiobook is or how many snacks are involved.
Every ninety minutes or so, we stop, even if it’s just a gas station with a patch of grass to run around on for ten minutes. This adds time to the overall trip, sometimes an extra hour or more on a long drive, but it completely changes the mood in the car. A ten-minute break to physically move around does more for everyone’s patience than any screen or snack combination.
Step Two: Let Everyone Have Input, Even the Little Ones
Our second road trip went noticeably better than the first, and the biggest difference was that I actually asked the kids what they wanted before we left, not just where to go, but things like what snacks they wanted in their personal bag and what games they wanted loaded on the tablet.
This sounds small, but giving them actual input changed how invested they were in the trip going well. My son picked out three audiobooks himself using the Libby app, which connects to our library’s audiobook collection for free, and he was far more engaged listening to something he chose than something I picked for him.
For the littlest kids who can’t really weigh in on logistics, even small choices help, picking which stuffed animal comes along, or choosing between two snack options at the store. It’s less about the actual decision and more about feeling like part of the planning.
Step Three: Build a Snack and Entertainment System, Not Just a Pile of Stuff
Our first trip, I threw a bag of mixed snacks and a couple of toys in the back and called it done. That bag was raided and empty within the first hour, leaving nothing for the remaining nine.
What works now is portioning everything by stop, not by kid. I pack snacks into individual bags labeled by which rest stop they get opened at, so there’s always something “new” to look forward to instead of everything being available all at once and gone immediately.
For entertainment, I rotate between audiobooks, a couple of car games that don’t need any supplies, things like the license plate game or twenty questions, and screen time saved specifically for the longest, most boring stretches of highway rather than used up in the first twenty minutes. Saving screens for when they’re actually needed, rather than defaulting to them immediately, made a noticeable difference in how restless everyone got.
Step Four: Build in One Genuinely Fun Stop, Not Just Gas Station Breaks
Somewhere around our third trip, I started researching one slightly out-of-the-way but genuinely interesting stop along the route, a roadside attraction, a small state park, a weird local museum, instead of just stopping wherever was convenient for gas.
This one change turned the drive itself into part of the experience instead of just an obstacle between home and the destination. We’ve stopped at a giant ball of twine, a tiny dinosaur-themed mini golf course, and a genuinely beautiful overlook none of us would have known about without checking. Roadside America is a website I use specifically for finding these kinds of offbeat stops along a given route, and it’s free to search.
A Real Example: Our Trip to the Grand Canyon
Last summer we drove from our home in Arizona to the Grand Canyon, about a four-hour drive that could easily have been done in one straight shot. Instead, we planned it as a loose two-day trip with one overnight stop.

We used GasBuddy to map out fuel stops along the cheapest route ahead of time, which saved us actual money on a long drive. We booked a single budget hotel about halfway, not because we needed two days to get there, but because breaking up the drive meant nobody arrived exhausted and cranky. We stopped at a roadside diner my husband found through a quick search the night before, and it ended up being one of the best parts of the whole trip, the kind of place you’d never find on a regular highway exit.
By the time we actually reached the Grand Canyon, everyone was in a good mood instead of road-weary, and that completely changed how much everyone enjoyed the destination itself.
Tools and Apps That Actually Helped
GasBuddy for finding the cheapest gas along a route, which adds up over a long trip more than people expect. The Libby app for free audiobooks through your local library, no extra subscription needed if you already have a library card. Roadside America for finding quirky, genuinely interesting stops that don’t show up in typical trip planning searches. And a basic offline playlist on Spotify, downloaded before leaving home, since cell service drops out more than you’d think on long rural stretches.
Common Mistakes to Avoid
Overpacking the schedule with too many destinations. Our worst trip tried to hit four different stops in one day, and everyone was exhausted and irritable by the third one. Fewer stops, done well, beats a packed itinerary every time.
Skipping a trial run before a really long trip. If you’ve never done a multi-hour drive with your kids, a shorter weekend trip first helps you figure out what actually works for your specific family before committing to something longer.
Not accounting for time zone or daylight changes when planning stops. We once arrived at a planned hiking stop right as the sun was setting, completely avoidable with a bit more attention to timing during planning.
Assuming older kids need less planning than younger ones. My teenager actually needs more intentional planning around stops than my younger kids do, since boredom hits differently and a tablet alone doesn’t cut it for nine hours.
Forgetting a physical backup plan for technology. Phones die, tablets run out of charge, signal drops in rural areas. We now keep a couple of old-fashioned options, travel bingo cards, a deck of cards, in the car at all times as backup.
What I’d Actually Tell a Friend
If a friend told me they were dreading an upcoming family road trip, I wouldn’t tell them to just pack snacks and hope for the best. I’d tell them to plan around attention spans instead of mileage, let the kids have real input into the trip, and build in at least one stop that’s actually interesting, not just functional. That first miserable trip taught me something I didn’t expect, the destination was never really the problem. The hours in the car were. Once I started planning those hours as carefully as I planned the destination itself, road trips stopped being something to survive and actually became something everyone looked forward to.